Migrating a website can be a daunting task. Whether it’s due to a change in hosting provider, a website redesign, or a new domain, there are a lot of moving parts to consider. Without proper planning, website migration can result in a loss of traffic, decreased search engine rankings, and broken links.
That’s why we’ve put together the ultimate website migration checklist to ensure a seamless transition. From pre-migration planning to post-migration testing, we’ve outlined 18 essential steps to help you prepare for a successful website migration. Follow these steps to minimize downtime, maintain search engine rankings, and keep your website running smoothly throughout the entire migration process.
1. Select your time carefully
It’s crucial to choose your schedule wisely if you need to relocate your website. You can guarantee that your site’s transfer will have the minimal impact on your visitors in this method. Naturally, your material will be inaccessible while you relocate your site, so a temporary decline in traffic is inevitable. However, you may lessen this impact by moving your website outside of busy hours. Choose peaceful times instead, such extremely early in the morning or late at night. Obviously, where your servers are located and where the bulk of your traffic originates will determine this.
It might be challenging to identify a time when all of your visitors are asleep if you serve a worldwide audience. It could be simpler to transfer your site during a time when your consumers experience the least amount of downtime for small firms that cater to a more regional clientele.
2. Inform your clients
There is no website migration check list that is complete without consumer notification. It’s always crucial to inform your visitors about the process even if you may schedule your move to be more convenient for them. You may, for instance, post a notification on your website or send a direct email to your subscribers.
Customers will be informed to avoid your website while the work is being done in this manner. This is crucial for an online company in particular since it allows customers to place their purchases before your website goes down. As a consequence, you can lessen the potential income loss from your website relocation.
3. Put your site in maintenance mode
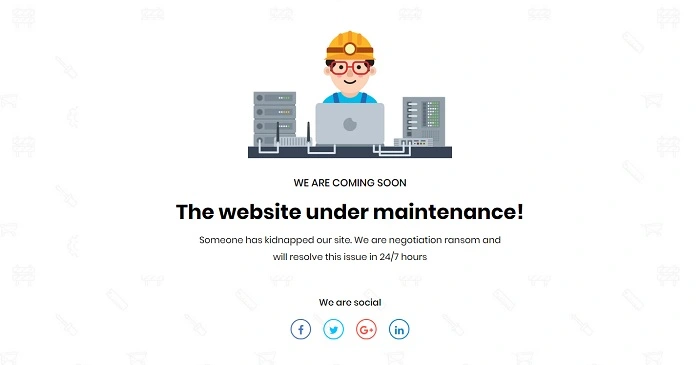
Before you get started with the website migration process, one more crucial step on our checklist for the process is to place your website into maintenance mode. This is particularly important to keep in mind if you manage a website with several authors, such as a news website or a blog.
You may prevent users from altering the content of your site during the transfer by placing your website into maintenance mode. This will prevent people from accessing your site. During this time, for instance, authors won’t be able to make edits to their posts or publish new ones. During this time, site visitors won’t be able to read it or interact with it in any way.
Even better, the plugin assists you in the creation of a bespoke maintenance mode message, which enables you to maintain your User Experience (UX). Additionally, you may add a contact form or subscription form to your maintenance page in order to provide a means for site visitors to be alerted when the transfer process has been completed.
4. Ensure that you have a recent backup of your website
Creating a new backup of your website is one of the items on a website migration checklist that is considered to be among the most important. By doing so, you can ensure that the copy of your website you have on hand is accurate and up to date. If anything does go wrong, it will be quite easy to return your website to how it was before the problem occurred.
There are a great number of backup plugins available to assist you in doing this. Nevertheless, the Jetpack is an outstanding option. Getting your website back up and running is as simple as clicking a single button thanks to the one-click restoration procedure. In addition, you will be able to back up not just your WooCommerce customer and order data, but also all of the files on your website.
5. Ensure that you are prepared with your new hosting credentials

In the next step of the website migration checklist, you will need to have your new hosting credentials ready. It’s possible that you’ve already created a whole new hosting account. If this is the case, you may reacquaint yourself with the tools and settings, or if you have a query regarding the migration process, you can contact the support staff.
However, if you haven’t decided to find hosting service just yet, now is the time to think about the many alternatives available to you. The good news is that there are a large number of reputable hosting companies, such as Bluehost, that make WordPress installation completely free. If you want to look for a new web host right now, you will buy yourself some additional time before the move. As a result, you have the option of establishing a new account for yourself and checking to see if there are no problems.
6. Turn off any caches, firewalls, or plugins that divert traffic
It is essential to deactivate any cache plugins, firewalls, or redirect plugins that are already running on your website just before you get to the stage when you migrate your content. This is due to the fact that instruments of this kind have the ability to generate a variety of problems throughout the process of migration.
For example, a firewall may restrict the amount of queries that may be sent to your website. On the other hand, the migration process might sometimes create a large number of requests that include the website files that are being migrated. As a consequence of this, the firewall may reject certain requests, which may result in a timeout error.
On other occasions, you could get errors of the type 403 Forbidden or 500 Internal Server when using these tools even if you have disabled them. However, you must not forget to reactivate these plugins after your website is up and running with your new server. This is an extremely vital step.
7. Set up a development or staging environment
Setting up a development or staging environment is a crucial step in ensuring a seamless website migration. This dedicated environment allows you to test and make necessary changes without affecting the live site and user experience. It serves as a safe space to troubleshoot any issues and ensure that everything is working smoothly before deploying the changes to the live site.
To set up a development or staging environment, start by creating a separate server or subdomain where you can replicate your website. This environment should mirror the live site as closely as possible, including the same database, files, and configurations. This ensures that you can accurately test the migration process and any changes you make along the way. Utilizing a site transfer plugin such as Duplicator is a method that makes the process much simpler overall. The user interface is intuitive, and it assists you in maintaining a secure environment when transferring files and data from one location to another.
8. Point your domain name to your new host
The maintenance of domain names is the next item on the website migration checklist. You are going to have to point your domain name to your new host before you can determine whether or not the transfer of your website was successful. There is a good chance that you are familiar with the term “Domain Name System” (DNS) records, but you may not fully understand what they are. DNS records, in their most basic form, help to establish a connection between your domain name and the servers that host your website, including the nameservers that are provided by your host.
If you are moving your website to a new host that offers free migrations, the nameservers on your website will most likely be updated immediately by your new hosting company. Therefore, at this time, there won’t be anything for you to do.
You may have registered your website’s domain name via a domain registrar, in which case you will need to manually migrate your site. If that is the case, you will need to access that account and make the necessary changes to your DNS settings.
9. Test your SSL certificate
Here you should begin by verifying that your SSL certificate is working properly.
The most effective method for doing this is to load up your website in a private window. If there is a lock symbol to the right of your website’s URL, then you are aware that the SSL certificate is functioning properly. On the other hand, if a security alert appears, you will need to double verify to ensure that you have installed an SSL certificate via your server. As a result, it is possible that you may want assistance from the customer support staff.
10. Test your website’s functionality
The functionality of your website should then be thoroughly tested to ensure that there are no UX or UI problems. It’s better to open a new tab and go to the front end of your website first. All you have to do is go through your pages like a client would.
So, if your website has any forms, you may fill them out and submit them. By clicking on links, writing comments on your blog articles, or adding items to your shopping cart, you may test the frontend operation of your website.
It’s crucial to remember the functioning of your site’s backend, however. As a result, you are free to explore your WordPress admin panel.
You may verify that your plugins are enabled and configured properly. Additionally, you can guarantee that users can still access the dashboard. It’s also a good idea to make sure that all of your automatic tools are functioning properly. For instance, you can ensure that an email marketing service is collecting email addresses if it is synchronised to your membership form. Make a new backup and make sure the plugin is keeping copies of your website.
11. Run a page speed test

A page speed test is one of the last tests to run once your website has been migrated. You may identify any problems with your new server.
Simply use your favourite speed testing application to get going. Both Page Speed Insight and Pingdom are great choices. You will be able to obtain a thorough report regarding the performance of your site when the test is over. You should get a good rating if you switched to a speedier web host. If not, it would be worthwhile to get in touch with customer service to let them know about a possible problem.
12. Verify that your website can be indexed
It’s time to confirm that your website can be indexed as you approach the end of the website migration checklist. Otherwise, the search engine results page won’t display your sites.
Logging into your Google Search Console account (or making one if you don’t already have one) is the simplest method to do this. The URL Inspection tool may then be used to examine each of your pages.
13. Close your previous hosting account
Following your website migration, if you’ve performed all the necessary tests, you’ll be able to determine whether the procedure was successful. As a result, if you’re satisfied with the quality of your new website, you may terminate your previous hosting account (barring the registration of any additional domains or email addresses) with the company. You could be done with our website migration check list at this time. However, it’s a good idea to do five extra stages if you changed to a different domain throughout the procedure.
14. Replace and search in your database
You’ll need to do more than just transfer your website’s files and database if you manually changed your domain. This is because the database will have references to your previous domain name. Therefore, using the search and replace option is an excellent idea.
You may locate every instance of your old domain throughout this procedure and replace it with your new one. Naturally, you may do this manually. But mistakes may be made rather easily. Based on an open-source Search Replace DB Script, this tool’s search and replace feature. However, it has been altered to guarantee seamless compatibility with WordPress’s built-in database features.
15. Set up 301 redirects
Following the transfer of your website, it’s also crucial to set up 301 redirects if you’ve changed your domain name. As a result, clients who access your old URL will be instantly sent to your new website.
You may configure 301 redirects for your website in a variety of ways. For instance, certain SEO plugins make this feature available. But using a specialized plugin like Redirection is the surest course of action. Additionally, if you have expertise with WordPress, you may create 301 redirects by making changes to your.htaccess file.
16. Check your reroutes
It’s crucial to verify that 301 redirects are functioning after putting them up. A 404 error will be returned if they aren’t functioning correctly when someone requests your website:
After a website transfer, set up 301 redirects to prevent 404 errors.
Even if you may design a personalized 404 page to save the user experience, 404 mistakes might lower your site’s search engine rating. To effectively notify visitors (and search engines) that your site has been permanently relocated to a new place, it is crucial to set up your 301 redirects.
17. Update DNS settings and name server information
As said, your DNS settings will most likely be updated automatically if your new web host is managing the transfer of your website. However, you’ll have to do this on your own if you’re manually moving your site (and changing to a different domain).
Depending on your domain registrar, the procedure appears somewhat differently. However, you must first determine which nameserver records to utilize.
This information is often available from your new web host. But to give you an example, your nameservers may be ns1.bluehost.com or ns2.bluehost.com if Bluehost is your new web host. Nevertheless, some web hosts make use of IP addresses.
Then, by login into your hosting account or the account of your domain registrar, you can often modify your nameserver information and DNS settings. You may accomplish this, for instance, if you use Domain.com, by selecting the DNS & Nameservers tab in the sidebar.
18. Search your website to find problems
Crawling your website to find any problems the migration may have created is the last stage of website migration checklist. This may include duplicate URLs, redirect chains, and broken links.
You may find a free website crawling tool, such as Screaming Frog or the industry standard Ahrefs, to get started. However, this is a paid option.
These tools allow you to export errors and source URLs if you’re employing a developer to repair these issues in addition to crawling and auditing your website for SEO problems.